
Products You May Like
Android is among the most versatile cellular ecosystems that you just’ll ever use. From the feel and appear, you’ll be able to change the panorama of the platform with ease and energy. The fonts in your system aren’t any exception.
There are many causes you would possibly need to change up your fonts — legibility, firm branding, a novel look and extra. Though not obtainable for each variation of the Android theme, you’ll be able to change up your fonts with out an excessive amount of problem. I need to illustrate how one can handle extra and higher fonts on each rooted and unrooted Android units.
Leap to:
Unrooted vs. rooted Android units: What’s the distinction?
Any regular smartphone you would possibly purchase from a good retailer is probably to be unrooted. Rooting is a course of that offers customers extra management over their Android units. This course of shouldn’t be one thing achieved by the unique telephone producer.
Rooted Android units give customers root entry, permitting them to put in apps that require such a entry. Customers who’ve rooted units may also change system settings and modify the software program on the system.
SEE: Discover ways to unroot your Android device.
Whereas rooting units comes with advantages, it additionally has some downsides, together with doable issues with official updates, app compatibility, safety dangers and the chance of voiding the assure.
With regards to fonts, a rooted Android system provides you fairly a bit extra management over what you are able to do. However, even unrooted smartphones have some flexibility on the subject of fonts. Let’s first have a look at methods to handle your fonts on an unrooted system, after which, I’ll spotlight the ability of the rooted smartphone.
Android font apps for unrooted units
Your finest wager for managing fonts on an unrooted Android system is by the use of a third-party Android font app. GO Launcher EX is among the hottest fonts for this goal. With this residence display screen launcher, you’ll be able to obtain any third-party font information into the GOLauncherEX/fonts folder and have GO Launcher EX scan the folder so as to add the brand new fonts.
There’s one catch. While you plug your system into your laptop to repeat the .ttf file(s) over to the telephone storage, you most likely received’t discover the GOLauncherEX folder. To get round that, create a folder referred to as FONTS within the Downloads folder — after which, utilizing a file supervisor like ASTRO File Manager, copy and paste the .ttf file to GOLauncherEX/fonts, which can seem within the ASTRO File Supervisor.
To scan new fonts with GO Launcher EX observe these steps:
1. Open GO Launcher EX by tapping on the app.
2. Lengthy-press on your own home display screen.
3. Faucet on GO Settings.
4. Choose Font from the menu (Determine A).
Determine A
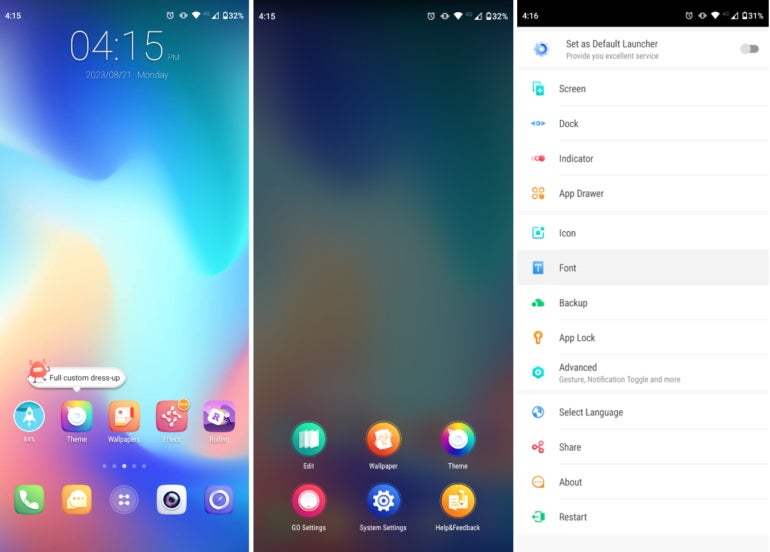
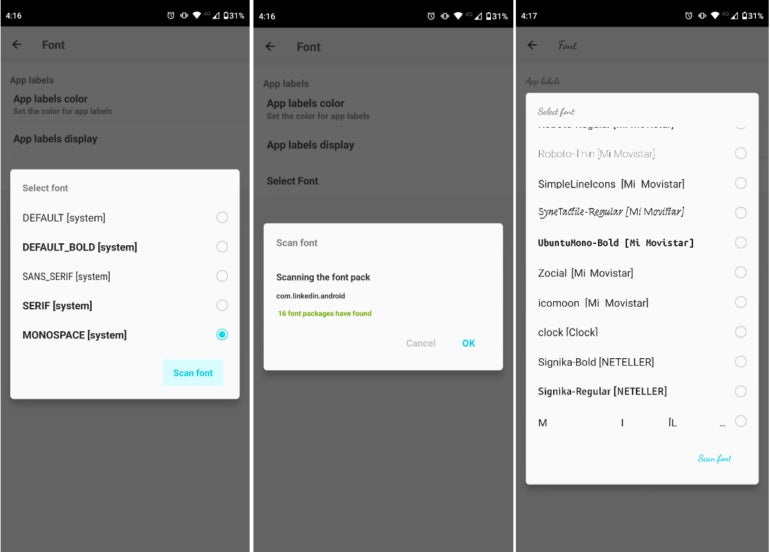
5. Now, faucet on Choose Font. The app will present you an inventory of all of the obtainable fonts.
6. Faucet Scan Font on the backside of the app to seek for the brand new fonts you obtain into your telephone folder. The app will routinely run a scan and present you an inventory of all of the obtainable fonts, together with those you downloaded.
7. Discover the font you need, and choose it (Determine B).
Determine B
Different font apps for Android
What should you don’t need to use a third-party residence display screen launcher? In the event you occur to have a Samsung system, you’re in luck (rooted or not). iFont is one other standard app that means that you can browse a big number of fonts, obtain them and set up them. It’s vital to notice that iFont solely works on Samsung telephones.
SEE: Android 12 allows you to use themed icons.
To obtain, choose and set up fonts with iFont:
1. Obtain and set up iFont.
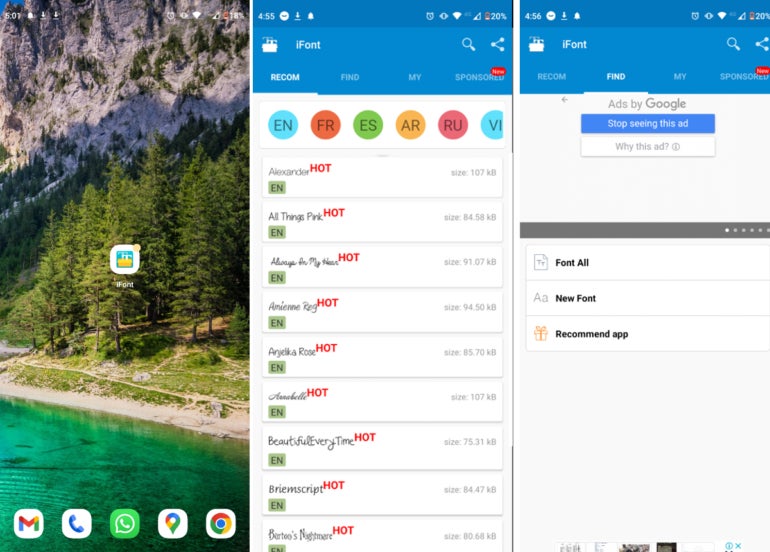
2. Open the app.
3. On the highest menu, select FIND, after which, faucet Font all. A full checklist of accessible fonts will seem (Determine C).
Determine C
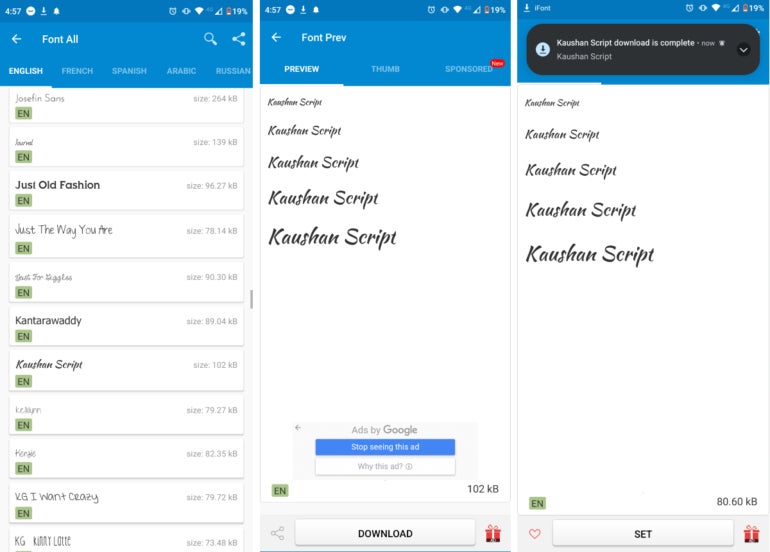
4. As soon as you discover the font you need, faucet on it, choose Obtain after which faucet Choose (Determine D).
5. After getting put in the font, go to your Samsung Show and Gesture menu in your telephone beneath Settings, and choose the brand new font as your default font.
Determine D
Apart from iFont, there are a number of Android font apps you’ll be able to obtain from the Play Retailer. These embody HiFont and FontFix, each of that are for rooted units.
Altering fonts on rooted Android units
Customers who’ve a rooted Android system could make the font modifications they need utilizing totally different apps. Let’s look into two of probably the most extensively used, iFont and Font Installer.
How to vary fonts with iFont
A rooted system provides you with much more energy with fonts. In case your telephone is rooted, you need to use iFont to put in customized .ttfs for use as your system defaults. The method is much like setting an ordinary font with iFont.
To do that:
1. Open the iFonts.
2. Go to My after which My Font, after which, faucet click on this written in purple (Determine E).
Determine E
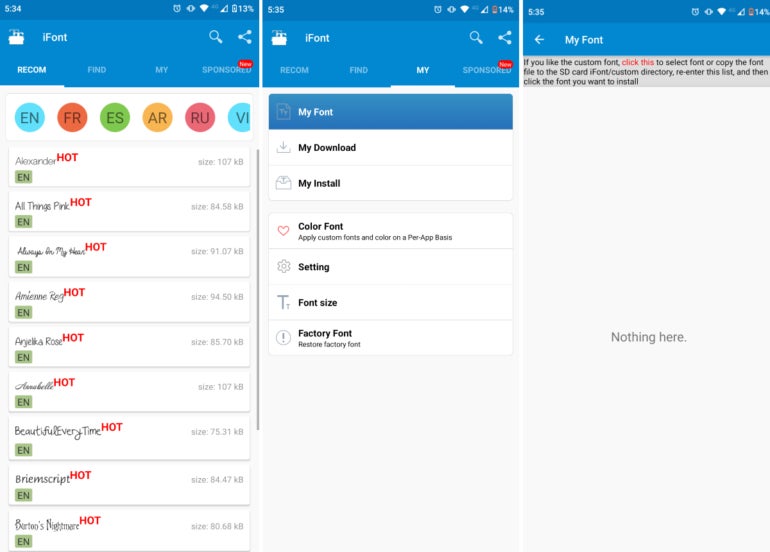
3. The app will open a file explorer so that you can search the folder the place you downloaded the .ttfs file after which choose it.
How to vary fonts with Font Installer
Font Installer is an app you need to use so as to add .ttf information out of your laptop to your rooted smartphone and use them because the default system font. As soon as put in, you’ll be able to then copy your .ttf information out of your laptop right into a listing in your system and use that font because the default.
SEE: Right here’s methods to reset your Android home screen back to the default.
Right here’s methods to set a font with Font Installer as your system default:
1. Install Font Installer in your rooted Android system.
2. Copy your .ttf information right into a folder in your system.
3. Open Font Installer, and swipe to the Native tab.
4. Navigate to the folder containing the .ttf information, and choose the file for use.
5. Faucet Install or Preview if you wish to get a have a look at the font first. If prompted, grant root permission for the app.
6. Reboot the system by tapping YES.
A phrase of warning with Font Installer: This app shouldn’t be at the moment obtainable by the Play Retailer. Moreover, it doesn’t work on all rooted units.
In the event you’re searching for a clear and easy strategy to change the font, look no additional than certainly one of these strategies. Whether or not rooted or not, yow will discover loads of fonts to assist personalize or model your Android system.